
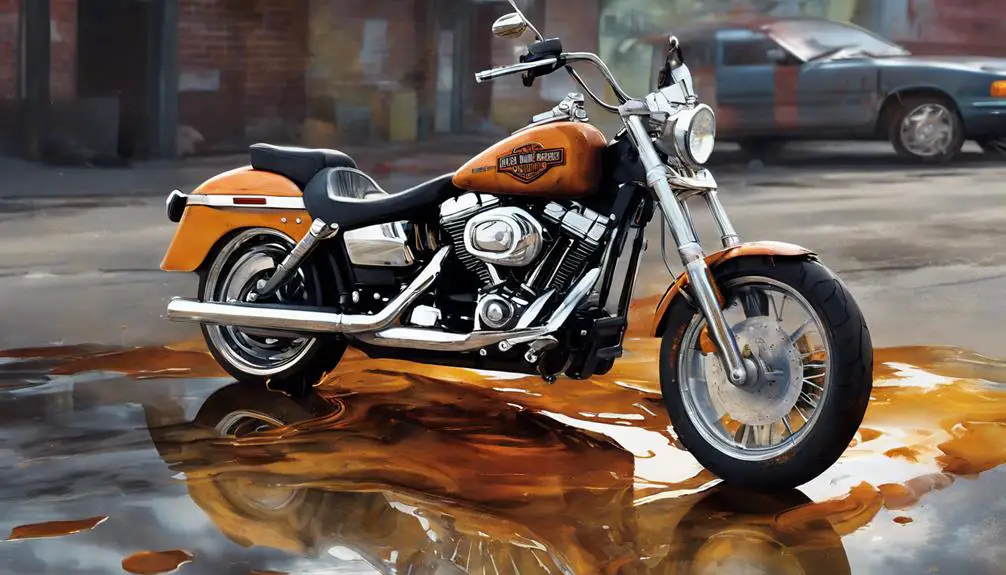
If you’ve noticed mysterious puddles under your Harley Davidson, you might be dealing with common fluid leaks that can signal underlying issues. From oil leaks to brake fluid and coolant leaks, each has its own set of warning signs. Understanding these leaks is vital for maintaining the performance and longevity of your motorcycle. So, before you hit the road again, it’s important to grasp the ins and outs of these leaks to keep your Harley running smoothly.
Key Takeaways
- Oil, brake fluid, and coolant leaks are common in Harley Davidson bikes.
- Detect leaks by visual inspection, fluid color identification, and trace origins.
- Check engine, transmission, primary drive, fork seals, and brake system for leaks.
- Regular maintenance prevents leaks by tightening fittings, replacing damaged parts, and avoiding overfilling.
- Professional help ensures specialized knowledge, quality repairs, time efficiency, prevention of further damage, and peace of mind.
Related read: Round ‘Em Up: What Year Harleys To Avoid? (Full Overview)
Types of Fluid Leaks in Harley

Identifying the various types of fluid leaks in your Harley is essential for proper maintenance and troubleshooting. One common type of leak is an oil leak. If you notice dark brown or black fluid under your bike, it could be an oil leak. This could be due to a loose drain plug, overfilled oil tank, or worn-out gaskets.
Another common leak is a brake fluid leak. If you see a clear or light brown fluid near the wheels, it could indicate a brake fluid leak. This is a critical issue that needs immediate attention to guarantee your safety on the road.
Coolant leaks are also important to watch out for. A green, pink, or orange fluid pooling under your bike may signal a coolant leak, which can lead to overheating if not addressed promptly.
Identifying Oil Leak Symptoms
If you notice a dark brown or black fluid under your Harley, it may indicate an oil leak. Identifying oil leak symptoms is important for maintaining your bike’s performance and preventing potential issues.
One common sign of an oil leak is seeing oil spots or puddles under your motorcycle when parked. You might also observe a burning oil smell while riding, indicating oil is dripping onto the hot engine parts.
Keep an eye on your oil levels; if they consistently drop without a reasonable explanation, there might be a leak.
Pay attention to any unusual engine noises or a decrease in performance, as oil leaks can lead to engine damage if not addressed promptly. Examine the engine and surrounding areas for visible signs of oil seepage, such as oily residue or wetness.
Taking action at the first sign of an oil leak can save you from costly repairs down the road.
Common Causes of Fluid Leaks
Now, let’s talk about the common causes of fluid leaks in your Harley Davidson.
You’ll explore leak detection methods, learn about common fluid leak locations, and discover essential information on repair and prevention.
Understanding these key points will help you maintain your bike’s performance and prevent potential issues down the road.
Leak Detection Methods
To effectively pinpoint the source of fluid leaks in your Harley Davidson, conduct a visual inspection of common areas prone to leaks such as gaskets, seals, and hoses. Look for any signs of wetness, drips, or puddles beneath your bike. Trace the fluid trail to its origin, as leaks can sometimes travel along components before dripping down.
If the leak isn’t immediately visible, wipe down the suspected area with a clean cloth and run the engine briefly to pressurize the system. Check for fresh leaks once the engine is turned off.
Another effective method to detect fluid leaks is by using UV dye additives. Add the dye to the fluid reservoir and run the engine to circulate it through the system. Shine a UV light on the components, and the dye will glow, highlighting the source of any leaks. This method is particularly useful for identifying small or hidden leaks that may go unnoticed during a visual inspection.
Fluid Leak Locations
Common culprits for fluid leaks in Harley Davidsons are often found in specific locations. Leaks in the engine can be caused by issues like damaged gaskets or seals, leading to oil leaks. Transmission leaks may result from worn seals or loose connections, causing transmission fluid to seep out. In the primary drive area, leaks can occur due to problems with the primary gasket, leading to primary fluid leaks.
Another common location for fluid leaks in Harley Davidsons is the fork seals. If you notice oil dripping from the front forks, it could indicate a leak in the fork seals, which may need to be replaced to prevent further leakage.
Leaks from the brake system can occur at the brake lines or calipers, affecting the braking performance of your motorcycle.
Regularly inspecting these areas can help you identify and address fluid leaks promptly, ensuring peak performance and minimizing the risk of more significant issues down the road.
Repair and Prevention
Inspecting and addressing common causes of fluid leaks in your Harley Davidson can help maintain peak performance and prevent potential issues. Regularly check for loose fittings, damaged gaskets, or worn-out seals that could be causing leaks. Tighten any loose connections and replace any damaged components to prevent further leaks.
Pay close attention to the oil drain plug, oil filter, and transmission seals as these are common areas for leaks to occur. Additionally, make sure that all fluids are at the correct levels and not overfilled, as this can also lead to leaks.
Taking proactive steps to address these issues can save you time and money in the long run by avoiding more significant repairs down the line. Remember, staying on top of maintenance is key to keeping your Harley Davidson running smoothly and leak-free.
– Latest Reads
- 5 Best Motorcycle Locks To Keep Your Ride SecureMotorcycle theft happens fast and if you think it won’t happen to you, that’s exactly what thieves are counting on. Whether you park on the street, at work, or even in your own driveway, the right lock can be the difference between riding home and filing a police report. In this guide, we break down… Read more: 5 Best Motorcycle Locks To Keep Your Ride Secure
- Harley Code P1510: The Best Explanation Of Causes And FixesWhen it comes to Harley Davidson motorcycles, there’s a lot to understand regarding error codes. This article offers an in-depth look at Harley Code P1510. This code is common among Harley Davidson motorcycles, especially those with handlebar alterations. We’ll talk about when you should be concerned, what you should know, and what you can do… Read more: Harley Code P1510: The Best Explanation Of Causes And Fixes
- Harley Davidson Code C0077 – The Causes And How To FixHarley Davidson diagnostic code C0077 indicates a low tire pressure condition. Such a condition can lead to decreased fuel efficiency and increased tire wear. Neglecting this issue can also lead to safety hazards, such as tire blowouts and loss of control while riding. Read to understand what causes the code, how to fix it, and… Read more: Harley Davidson Code C0077 – The Causes And How To Fix
- The Complete Overview Of Harley Davidson Code P1632Harley Code P1632 is a common trouble code encountered by Harley Davidson riders and mechanics. The code refers to the “Odometer Learned Up” error, an issue related to the vehicle’s speedometer and odometer systems. So what does this mean for you, and should you be concerned? Well maybe, but what can you do about it?… Read more: The Complete Overview Of Harley Davidson Code P1632
- Harley Davidson Diagnostic Codes: The Most Complete GuideHarley Davidson motorcycles, with their robust engines and iconic design, represent the perfect blend of power and style. But even these legendary bikes can run into technical issues. Recognizing and resolving these challenges is key to maintaining their performance and longevity. One effective method for identifying problems is by scanning your bike for Harley Davidson… Read more: Harley Davidson Diagnostic Codes: The Most Complete Guide
- Harley Davidson Fat Boy Oil Capacity: The Ultimate GuideIf you’re a Harley Davidson Fat Boy owner, you should know that understanding the oil capacity of your bike is important for its best performance. It is actually one of the most important aspects of maintaining a Harley Davidson Fat Boy. Whether you ride daily or only on weekends, knowing the correct engine oil capacity… Read more: Harley Davidson Fat Boy Oil Capacity: The Ultimate Guide
- Harley Davidson Starter Relay Problems: The Ultimate GuideEncounter a delay when expecting the thundering rumble of your Harley Davidson? You’re not alone. A myriad of riders face the occasional hiccup with motorcycle starter issues, casting a shadow on the joy of the ride. In this critical guide, we plunge into the technical depths of Harley Davidson starter relay problems – dissecting symptoms,… Read more: Harley Davidson Starter Relay Problems: The Ultimate Guide
Steps to Fix Fluid Leaks
Now, let’s talk about how you can tackle those pesky fluid leaks in your Harley Davidson.
First, we’ll cover leak diagnosis techniques to pinpoint the issue accurately.
Then, we’ll guide you through the steps to repairing the fluid leaks effectively.
Leak Diagnosis Techniques
To pinpoint the source of fluid leaks in your Harley Davidson, begin by systematically checking all potential areas of vulnerability. Start by examining the oil drain plug and the oil filter for any signs of leakage.
Move on to inspect the oil lines, looking for any cracks or loose connections. Verify the oil tank and the oil filler cap next, making sure they’re tightly sealed.
For fuel leaks, investigate the fuel lines, connections, and fuel tank for any drips or spills. Pay close attention to the carburetor and fuel injectors, as they can also be culprits of leaks.
When dealing with brake fluid leaks, examine the brake lines, fittings, and calipers for any seepage. Inspect the brake master cylinder and reservoir for any signs of fluid loss.
Lastly, for coolant leaks, check the radiator, hoses, and connections for any leaks or drips. Confirm the coolant levels are adequate and that there are no visible signs of leakage around the water pump.
Repairing Fluid Leaks
Begin by identifying the source of the fluid leak in your Harley Davidson before proceeding with the necessary repair steps.
Here are some straightforward steps to help you fix those pesky leaks:
- Locate the Leak: Use a flashlight to inspect your Harley Davidson and pinpoint the exact source of the fluid leak.
- Check the Seals: Guarantee all seals and gaskets are in good condition and replace any that show signs of wear or damage.
- Tighten Connections: Check for loose connections or fittings and tighten them securely to prevent leaks.
- Use Sealant: Apply a high-quality sealant to any areas where leaks are occurring for a temporary fix.
- Consult a Professional: If the leak persists or you’re unsure how to proceed, seek assistance from a trusted mechanic or Harley Davidson specialist to avoid any further damage.
Preventing Future Leaks
To prevent future fluid leaks in your Harley Davidson, regularly inspect all seals and gaskets for signs of wear or damage. Checking these components frequently is essential to maintaining a leak-free ride. Look for any oil or fluid residue around the seals, as this could indicate a potential leak.
Make sure that the seals are properly seated and not cracked or deteriorated, which could lead to leaks over time.
Another vital step in preventing leaks is to use high-quality fluids and lubricants that are specifically designed for your Harley Davidson. Using the right products can help maintain the integrity of your bike’s seals and gaskets, reducing the risk of leaks occurring.
Additionally, when performing maintenance or repairs on your Harley, make sure to follow the manufacturer’s guidelines for torque specifications. Over-tightening or under-tightening bolts can put unnecessary stress on the seals, leading to leaks.
Professional Help for Harley Leaks
Consider seeking assistance from a certified Harley Davidson mechanic if you encounter persistent fluid leaks in your bike. These professionals have the expertise and knowledge to accurately diagnose and repair any leaks, ensuring your Harley Davidson stays in top condition. Here are five reasons why professional help can benefit you:
- Specialized Knowledge: Certified mechanics are trained specifically to work on Harley Davidson motorcycles, so they understand the intricacies of your bike.
- Quality Repairs: Professionals use genuine parts and follow manufacturer guidelines for repairs, ensuring long-lasting solutions.
- Time Efficiency: Mechanics can quickly identify the source of the leak and address it promptly, saving you time and hassle.
- Prevent Further Damage: By fixing leaks early on, you can prevent more significant issues from arising in the future.
- Peace of Mind: Knowing your bike is in the hands of a skilled professional can give you peace of mind and confidence in your rides.
Conclusion
In summary, it’s important to keep an eye out for common fluid leaks in your Harley Davidson. By regularly inspecting and maintaining your bike, you can prevent issues like oil leaks, brake fluid leaks, and coolant leaks.
Just like a well-oiled machine, a well-maintained Harley will run smoothly and effortlessly, ensuring a safe and enjoyable ride every time.
Stay vigilant, address any leaks promptly, and keep your Harley in top condition for the road ahead.